|
|
Snorting Liz Manjimup Timber Museum |
|
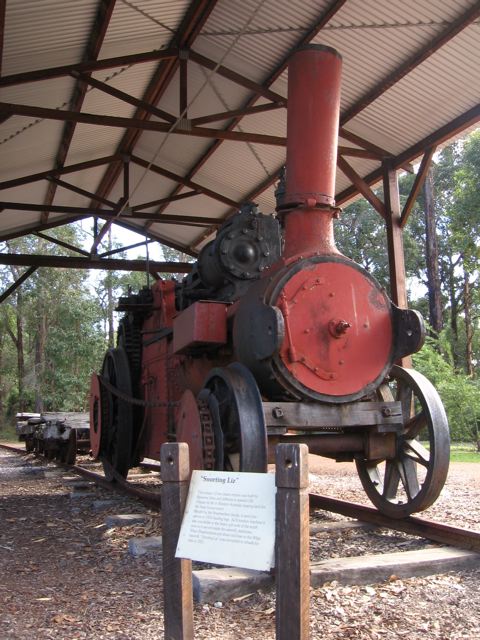
This view of the attractively named ‘Snorting Liz’ is courtesy
of Mark Smith and dated 14 July 2007.
A generous weather roof protects the loco
but doesn’t extend over the log jinkers.
The heavy-duty lugs at front of the smokebox
may relate to a role towing logs along the tramway,
or perhaps as anchors for a large chain used in its
original forest clearing role.
|
Builder |
Ransomes,
Sims & Jefferies, Ipswich
England |
|
Builder’s Number & Year |
C/N
18047 |
|
Wheel Arrangement |
0-4-0 |
|
‘Snorting Liz’ was built as traction engine by
Ransomes, Sims & Jefferies of Ipswich England. Liz started her career in
a conventional configuration, clearing land for the Western Australia Land
Settlement Board. In 1915 it was sold to Mr. B. W. Shepherdson for the Adelaide Timber Co, but they found her too heavy for use on wet ground and instead Liz was deployed as a stationary engine to run their Wilga sawmill, located in the forests south of Collie. In 1920 the Adelaide Timber Co built a steel-railed
horse powered tram to move logs to the mill. Horses were soon found to be unsatisfactory,
and another source of motive power was sought. The next year the Ransomes
tractor was removed from the mill and the mechanics went to work. A railroad
locomotive needs flanged wheels, so a pair of 60-inch locomotive driving
wheels and a pair of 39-inch freight car wheels were bought from the Western
Australian Government Railway’s scrap pile. With these additions Liz became a
42-inch gauge 2-2-0. With her tractor gearing and drivers 12 inches smaller
than her road wheel she had a top speed of about 3-4 mph. Liz was a little
short in the traction department, so sanders were added. Needing even more
power, sprockets and a roller chain to power the front wheels were added in
1922 or 1923 making Liz a very odd looking 0-4-0. Because of the different
wheel sizes, care had to be taken to get the ratio of the two sprockets just
right. The chain drive must have been both an
OH&S nightmare and an operational vulnerability, subject to snags and
other misadventures. As seen in a photo below, the chain was hidden under improvised
guards / guides when in service. After 15 years of satisfactory service hauling log trains of up to four cars as far as ten miles to the mill, Liz was laid aside. Even after the bush tram (logging railroad) was torn up in 1942, Liz sat at the mill in genteel retirement until as late as 1985. This
interesting relic is now displayed at the Manjimup Timber Museum, in company
with some logging jinkers (bogies). A second traction
engine converted to rail usage also survives in Western Australia: Polly at Collie. |
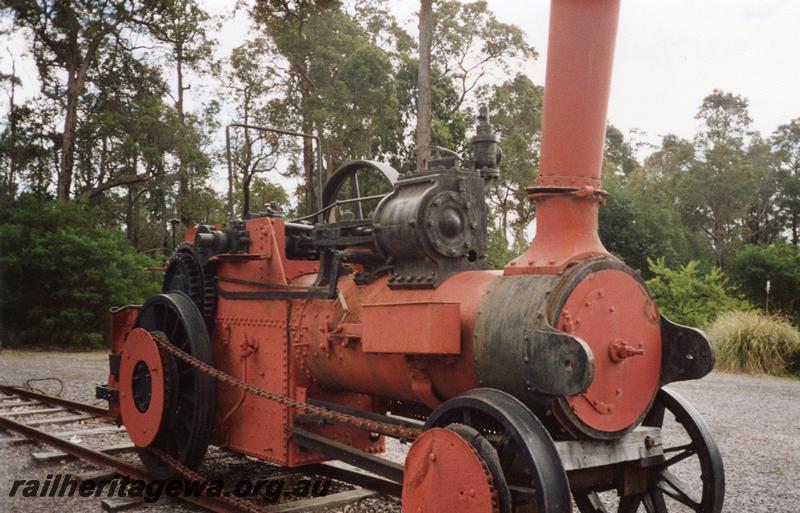
Front and side view of ‘Snorting Liz’ at Manjimup Timber
Museum. Photo dated 20 October 1996
The hinged chimney is clearly seen in
this view; I wonder why it was required – perhaps a low entry to a sawmill
building?
Image used with permission of the Rail
Heritage WA archive:
http://railheritagewa.org.au/archive_scans/displayimage.php?pid=4977
(Image reference P08369, original photographer – L.
Purcell)
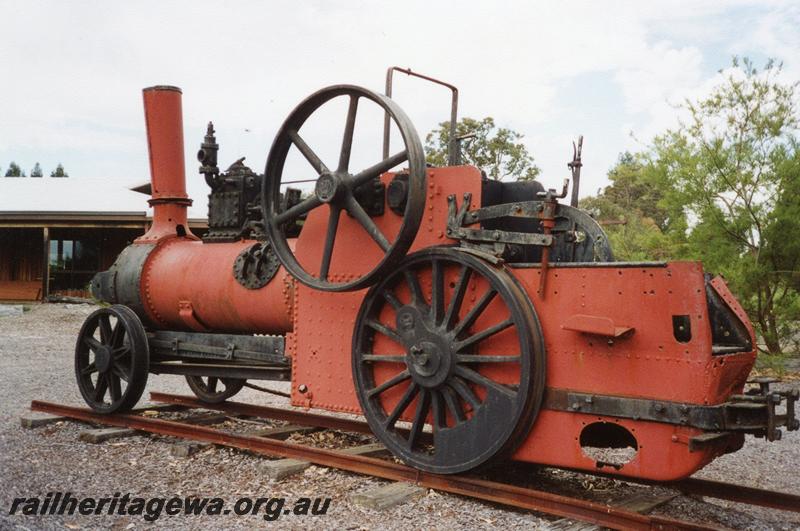
‘Snorting Liz’ at the Manjimup Timber Museum, side and end
view. Photo dated 20 October 1996.
The driving wheel is clearly a passenger
steam loco type!
Image used with permission of the Rail
Heritage WA archive:
http://railheritagewa.org.au/archive_scans/displayimage.php?pid=4979
(Image reference P08370, original photographer – L.
Purcell)
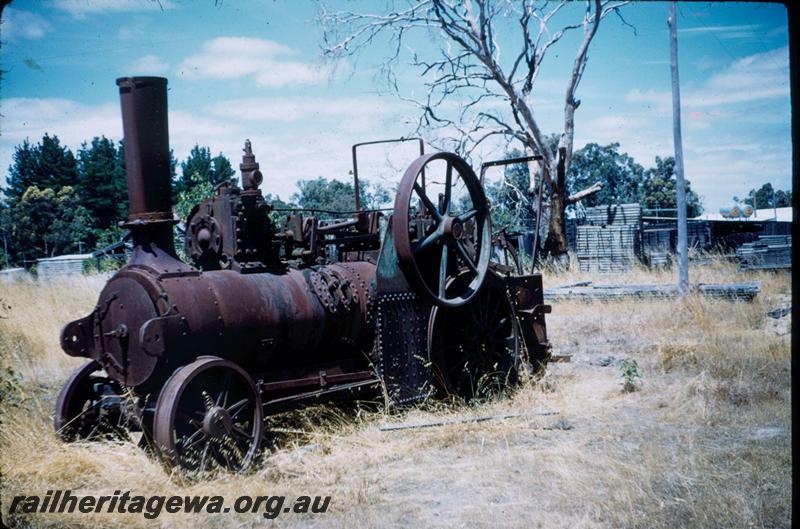
‘Snorting Liz’ abandoned at Wilga. Photo dated September
1962.
How this derelict artefact escaped scrap
is a mystery – perhaps due to its oddity.
In this view it is seemingly ‘out to
grass’ at the back of the sawmill.
Image used with permission of the Rail
Heritage WA archive:
http://railheritagewa.org.au/archive_scans/displayimage.php?pid=11688
(Image reference T03079, original photographer – R. Moss)
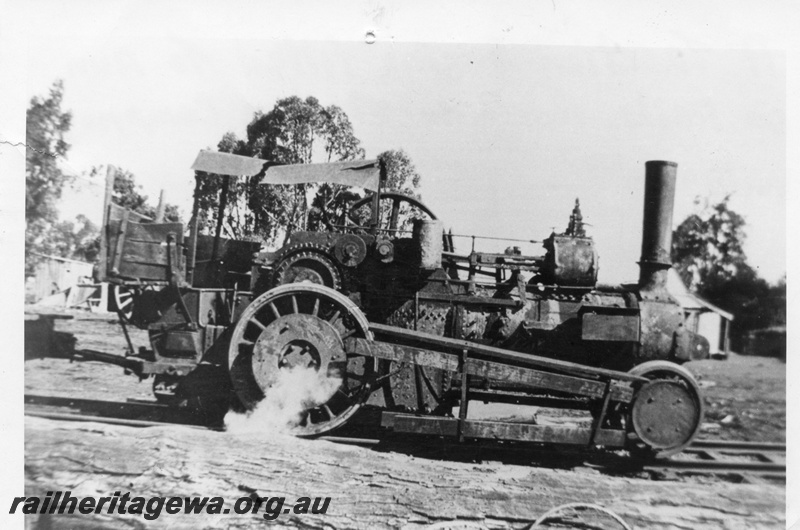
‘Snorting Liz’ in steam at Adelaide Timber Company's Wilga
mill, circa 1930.
The whisp of steam proves this
contraption DID work once!
The chain drive to the front wheels must
have been both an OH&S nightmare and an operational vulnerability, subject
to snags etc.
In this view it can be seen that the chain
drive was protected by improvised screens / guides.
Image used with permission of the Rail
Heritage WA archive:
http://railheritagewa.org.au/archive_scans/displayimage.php?pid=16629
(Image reference P02833, original
photographer – C. Shepherdson)
References
|
a |
Information provided by John
Taubeneck, via email, 12 September 2011 |
|
b |
|
|
|
|
Page updated: 28 July 2026
|
Government Railways: |
|
|||||||||
|
Private & Industrial Railways: |
|